Spring Security 기본 사용자 추가 및 테스트
✒️ 2025-05-28 14:13 내용 수정
Spring Security 기본 사용자 추가 및 테스트
-
참고 자료 : UGO04's 스프링시큐리티 공부 1 - 스프링 시큐리티란
-
Spring Security를 적용한 프로젝트를 생성하고, Security 기본 설정을 사용하여 사용자 추가 및 로그인 테스트를 진행한다.
-
SpringSecurity 프로젝트 설정 목록
- Spring Security 기본 사용자 추가 및 테스트
- Spring Security 프로젝트 설정 1 - DB연결과 JPA 설정
- Spring Security 프로젝트 설정 2 - JwtService와 Filter 설정
- Spring Security 프로젝트 설정 3 - Security Config
- Spring Security 프로젝트 설정 4 - Authentication Service와 Controller
- Spring Security 프로젝트 설정 5 - Security CORS 설정
- Spring Security 프로젝트 설정 6 - JWT Refresh Token 생성 및 저장
- Spring Security 프로젝트 설정 7 - JWT Refresh Token 재발급
- Spring Security 프로젝트 설정 8 - JWT 클라이언트 저장
- Spring Security 프로젝트 설정 9 - JWT 로그아웃
- Spring Security 프로젝트 설정 10 - 권한 설정
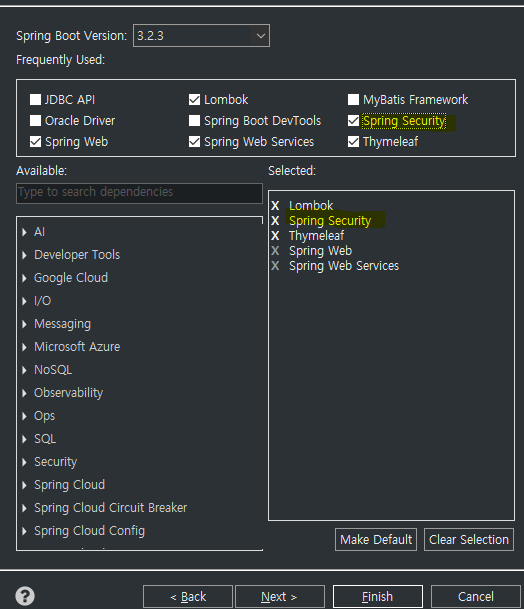
- 새 프로젝트를 만들고, dependency 설정에서 Spring Security를 체크한다.
- MyBatis와 DB 연결 관련 설정을 체크하고 관련 설정을 안 해주면 에러가 나기 때문에 DB 연결 설정 부분을 제거하고 테스트한다.
- IDE 프로젝트 외에도 https://start.spring.io/ 에서 필요한 Dependencies를 모두 적용한 프로젝트 파일을 생성하여 IDE에서 실행하는 것도 있다.
- application.properties이나 application.yml에서 서버 설정과 Spring Security 설정 중 사용자의 username, password, roles를 지정한다.
- 로그인 페이지에서 이 파일에 지정한 name과 password로 로그인을 하면 된다.
# properties file
# Server port
server.port=9090

# Spring Security 설정
spring.security.user.name=user
spring.security.user.password=password
spring.security.user.roles=USER
# yml file
# Server port
server:
  port: 9090

# Spring Security 설정
spring:
  security:
    user:
      name: user
      password: password
      roles: USER
TestController를 생성하여 기본 요청과 인증 정보 요청을@RestController로 작성한다.- REST와 REST API 참고.
Authentication에는 사용자의 정보에 관한 내용을 가지고 있다.
package com.ase.serverckecklist.controller;

import org.springframework.security.access.prepost.PreAuthorize;
import org.springframework.security.core.Authentication;
import org.springframework.security.core.context.SecurityContextHolder;
import org.springframework.web.bind.annotation.GetMapping;
import org.springframework.web.bind.annotation.RestController;

@RestController
public class TestController {

    @GetMapping("/")
    public String index() {
        return "This is Homepage";
    }

    @GetMapping("/auth")
    public Authentication auth() {
        return SecurityContextHolder.getContext().getAuthentication();
    }
}
- Spring Security 작동 테스트를 위해 서버를 실행하고, 웹 브라우저에서
http://localhost:port로 접속하면 Spring Security에서 기본적으로 설정된 로그인 화면이 뜬다.
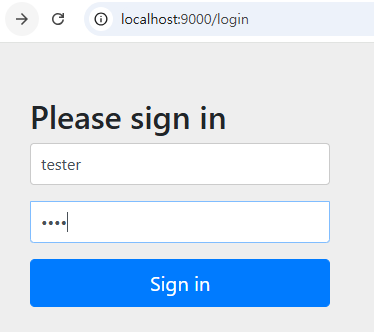
-
만약 설정 파일에서 적용한 사용자 이름과 비밀번호가 일치하지 않으면 실패 문구가 뜬다.
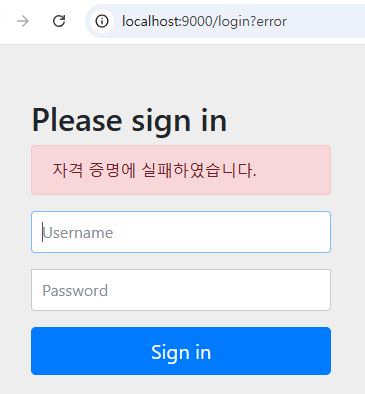
-
사용자 이름과 비밀번호가 일치하면
/로 넘어온다.
-
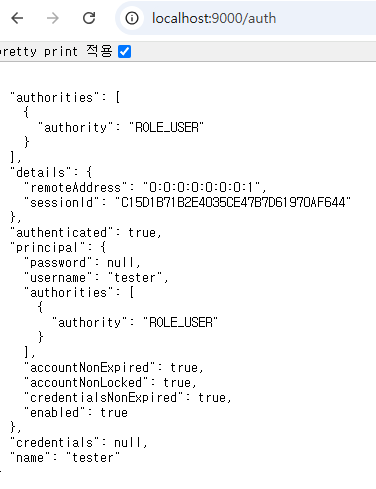
인증정보 요청을 위해
/auth로 접속하면 현재 접속한 사용자 계정에 대한 정보가 뜬다.authorities에는 권한이 있으며 설정 파일에USER라 설정된 부분이 여기선ROLE_USER로 표시되어 있다.details: 사용자의 접속 ip 주소(IPv6)와 session ID가 있다.authenticated: 인증 여부로, 로그인 후에 true로 표기되어 있다.principal:UserDetails객체로, 사용자의 신원에 관한 정보가 들어있다.credentials: 사용자의 비밀번호나 사용자 식별을 위한 자격 증명들이 있으며, 보안을 위해 인증 절차 후에null로 설정된다.name: 사용자의 이름이다.